How to track your blog visitors?

How to track your blog visitors?


As a new blogger(webmaster),it is always interesting to know how many people are visiting your blog/site,pageviews,where they are coming from,which sites are referring,how many are coming via Search Engines(google,yahoo,etc) and what they are typing in the search engines to visit your site.
These stastistics are very handy interms of improving your blog and it is for FREEsmile

If you search the google,you will find hundreds of sites which will track the visitors of your blog/site.But,some sites will provide more information about your visitors than the others.
So,how to do this?
Here are the best tracking sources interms of the feautures they provide.

Note:One thing is common for all the tracking sites.First you need to register,and provide the necessary information about your blog/website.Next,they will give you a html code and you have to embed it in your blog.
How to do that in blogger?
1.Sign in to your blogger dashboard.
2.Click on the 'layout' link next to your blog name.
3.Click on the "Add a Page element"
4.Select "html/javascript" and past the code they provide and SAVE THE CHANGES.

From then,your blog will be tracked and you can check your blog stats from time to time after logging in to your registrate's website.

So,here are the good ones:-


Sitemeter.com:This one is one of the Most Popular tracking source.This is as simple as 123. Just create an account,copy the code from your account and paste it in your blog as suggested above.
You have also the option to keep your blog stats PRIVATE.
They will give you the stats on how many pageviews(hits) per day,unique visitors,geolocation of the visitors,how many users online,and much more...As it is simple(not much animation),you site will load as fast as it is before.Stats are updated hourly.
You can setup a Free Account here

histats.com
Histats.com:Unlike the Sitemeter which is very simple, this site will have very cool and animated counters.
animated countersanimated countersanimated countersanimated counters

Tracking is updated every 5 minutes.I personally using this site for my blogs.Like Sitemeter,
this is also have the option to keep your site stats PRIVATE.
They will provide Animated graphs about your site visitors and fully animative.
You can register with them here

statcounter
Statcounter.com:Same here!As in the name,it is a stats counter.It is fast,free,and quick loading.
Invisible tracking is available and no ads on your site.All the stats are in real time and super fast.It is not much animated as histats.com.They will provide pageviews,unique vistors,visitors activity,search engine wars,keyword analysis,and many more..
Register a free counter for your blog here
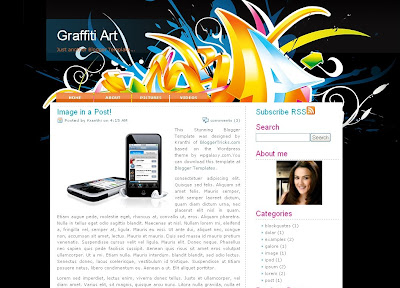
Another 3D Blogger Template "Graffiti Art"

Another 3D Blogger Template "Graffiti Art"


Yeah! Another Stunning Blogger Template for all of the BloggerTricks.com readers..
Over the past few days I saw so many of you guys blogging about this site and some are leaving very encouraging comments... that recharged me a bit...
so.. here's today's template "Graffiti Art".
If you have any art,design or any personal weblog, this theme well suits for your site..
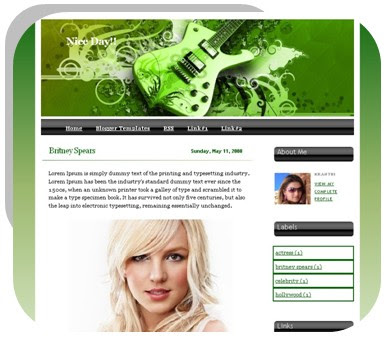
As you can see,the theme was very good looking with a Gorgeous 3D header image and lovely navigation links at the top and a nice sidebar.
This template was originally a Wordpress theme by wpgalaxy.com. I converted that into Blogger Xml format and hope you all like it!

screenshot

LIVE DEMO DOWNLOAD


Installation Help:
1. First Install the template by following the instructions here.

2.Once you installed the template,you have the edit the top links

edit the navlinks

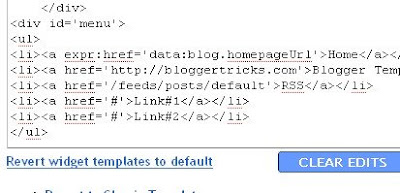
Go to 'Edit html' and scroll down the template code and find this piece of html code (hit Control+F to search)

Now, change the text(Home,About,etc) and add the respective links by Replacing the YOUR-LINK-HERE

3.And the final step is adding your Feedburner url
edit the feedburner url Find this code:

and Write your Feedburner url in the place of YOUR-FEEDBURNER-URL
and Save the changes!!

Leave a comment if you like the template of if you have any questions..

3 Column XML Blogger Template "Colors of Life!" - Download

3 Column XML Blogger Template "Colors of Life!" - Download


Download 3 Column Blogger Template "Colors of Life!"


Hi friends, here is my latest Blogger template (blogspot template) "Colors of Life!"

Feautures:
3 columns
Professional design
Adsense ready
Widget ready

Note:DON'T COPY & PASTE THE TEMPLATE CODE. Follow the below instructions:-

How to install this xml blogger template??
1.Sign in to your blogger dashboard
2.click on the 'layout' link.
3.Select the 'Edit html' tab at the top
and upload the template using the 'browse' button
Use the browse button to upload the template
4. 'Save' the changes.


Like the template or have any question to ask..?? ask it here via the 'comments' link.
-thanks

3 Column Blogger Template 'Pepper'

3 Column Blogger Template 'Pepper'


Here it is guys.. the todays template "Peppers 3 column Blogger Template".
Few people are asking me to design 3 column blogger templates over the past week and so.. So, here it is.. The template comes with well designed,fully packaged, 3 column dark Blogger layout.This wonderful design was first a wordpress theme designed by Jinsona of web2feel.com for Wordpress.org users. I converted it into our friendly Blogger format!
Have a look at the below screenshot,look at the Live Demo here and download this awesome template here.

Peppers template screenshot

After downloading the template and installing it, you have to do a few things...

1.First,change the navigation links at the top.

edit the navlinks in the template Scroll down the template code and find this piece

and Change the links and the corresponding text there.

2.Next, change the Rss feed link to yours

Search for this code and change the feed url to yours.

change the rss feed link 3.Third one is, if you hav sites like 'make money online etc,.. you can put the advertisers banners in that place.. otherwise, you can put some clickable pictures in that area.
change the ad pictures just look for this code

If you don't want to have those ads.. just remove that piece of code.

More templates are on the way

Download XML Blogger Template "Nice Day!"

Download XML Blogger Template "Nice Day!"


"Nice Day!" XML Blogger(blogspot) template:


Here is my latest Blogger template.The template is in xml format and is suitable for new Blogger(blogger beta).

Template Feautures:
Xml blogger template
2 Columns
Nice Cool Design
Professional look
Adsense Ready
Navigation bar at the top

How to install this template??

First download the template and extract the template to your hard disc.

1.First Sign in to blogger dashboard »» Click on the 'Layout' link »» Select the 'Edit html' tab at the top »»
and Upload the downloaded template using the browse button.

upload the template using the browse button2.Save the Changes.


How to edit the links in the Navigation bar??


How to edit the links
1
.After installing the template, scroll down the template code and you will see this code nearly at the bottom of the template code.
Just edit the links there...


how to edit the links

Releasing Wonderful Blogger Template 'CREATION'

Releasing Wonderful Blogger Template 'CREATION'


Download Wonderful Xml Blogger Template 'Creation'
Here is my today's Blogger Template.This template was very wonderfully designed,2 column Blogger(blogspot) template.This was originally a wordpress theme by Ophelia Nicholson of ophelianicholson.com. I converted that format to Blogger beta.
Look at the screenshot below and Live Demo and download this beautiful template here.

Creation template Screenshot


Please,read the following instructions carefully...

After downloading and uploading the xml file using the 'upload button' in the Templates »Edit html, you have to do a couple of things..
1.First change the top Navigation links to yours.
Change the navlinkshere is how to do that:
Scroll down the template and and you will find this below code..


and change the above links to yours..

2.Next, Change the date format by going to Settings »» Formatting

date header formatand change them like the below screenshot and Save the Change.

change the date header format like this
Hope you like the template! :) As I said earlier, this is just the start.. more lovely templates are on the way!
Thanks for your support!

Download 3 Column nice Blogger Template "Clean Dark":

Download 3 Column nice Blogger Template "Clean Dark":

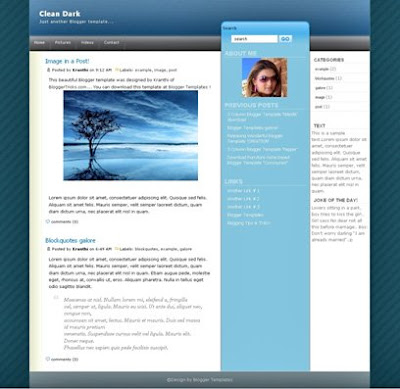
As I promised before to design more and more templates for you guys,.. here is my latest entry "Clean Dark". The design looks very professional with three columns and stylish easy navigation bar at the top.
This was originally a wordpress theme designed by some unknown guy.... I found this theme yesterday when I was searching for some good wp themes.. and this one seems good looking for me and I converted it to Blogger xml format.. I searched for the theme creator but I didn't got any information.. Ok .. anyways thanks to him.


Clean Dark template screenshot


Template Installation Instructions:


[First backup your present Blogger Template before uploading any Blogger template]

After downloading the template, unzip it and next sign in to blogger dashboard »» Layout »» Edit html
and upload the xml file using the browse button and Save the Changes.

Next, you can change the navigation links to your desired ones..

Edit the top navigation links to yoursJust Scroll down the template code and find this below piece of code and simply change the links and anchor text.


Hope you like it!

3 Column Vector Blogger Template 'Butterfly' - Download

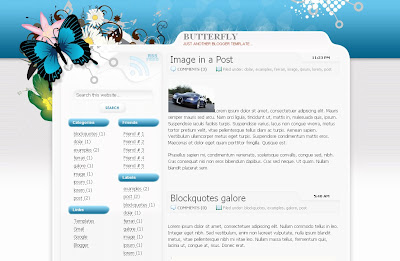
Here again, a new stylish, fantastic looking Blogger Template 'Butterfly' for you guys!
Butterfly template was originally a wordpress theme designed by Templates4all.com and I converted that into Blogger format.
As you can see in the below screenshot, the template comes with two sidebars in the left and the main coloum in the right side. The highlight of the template is the mind blowing vector header.

screenshot


If you are a newbie, first follow the basic installation instructions here
After installing the template,you have to edit the feedburner url

rss
go to Layout » Edit html
and find this below code and write your blog feedburner url


<.div align='right'><.a href='http://YOUR-FEEDBURNER-URL.COM'><.img align='top' alt='' src='http://myblogtalk.com/bloggertemplates/butterfly/images/spacer.gif' .style='width:150px; height:103px'/>


That's it! Leave a reply if you like the template or if you have any questions..

Remove Label Posts Count From Blogger

How to Remove Label Posts Count From Blogger showing the count of posts in that particular category. As its clear from the picure below what i am trying to say.


Its just simple step to remove the label count just follow the below step:-


Bowse To Settings > Edit Html > Expand Widgets

Press Ctrl+ F and search for below line

data:label.count/>

And delete it . Just Simple.

You will get this line in the codes in this way


<.span dir='ltr'>(<.data:label.count/>)


You can delete all codes.

Now check how it looks .

Display Scripts and css codes Between Blogger Posts

Have you tried using scripts in blogger posts.If not you can check by posting it as they are not visible in posts.
But now you can post these scripts with css codes in to the blogger posts.

For these scripts to display :

Just Follow These steps to add this " Post Styling Hack " to your Blog .

Step 1 :

Login to your Blogger account and navigate to Layout section . Then go to Edit Html Tab.

Step 2 : Add This CSS code above this ]]><./b:skin>

==============

.codeview {
margin : 15px 35px 15px 15px;
padding : 10px;
clear : both;
list-style-type : none;
background : #f9f9f9;
border-top : 1px solid #eeeeee;
border-right : 2px solid #cccccc;
border-bottom : 2px solid #cccccc;
border-left : 1px solid #eeeeee;
}
.codeview li {
font-size : 13px;
line-height : 24px;
font-family : "Courier New", "MS Sans Serif", sans-serif, serif;
color : #333333;
font-weight : normal;
margin : 0;
padding : 0;
}

==================

Step 3 :

Whenever you create new posts just include the speical Script ( CSS code , Scripts , etc ) within this div section .

<.div class="codeview">

Insert the Special code here

<./div>

Thx Mohamad rias for this hack.

You can edit these red lines in code to change the layout of this code review box.


*Note:-Before Posting the script in posts just make it friendly
by putting it here and then publish it between the posts.

Adsense link unit in your Blogger header

How to Place or Put an Adsense link unit in your Blogger header below your description in your header. You can also add it above description in your header below your title. This is very important trick to increase your CTR of Adsense. As it brings more Click on link unit from your Site.

Now How to add this link unit to your Blogger Header?

1.Login to your blogger
2.Go to LAYOUT tab
3.Then EDIT HTML tab
4.Click On EXPAND WIDGETS to expand html
5. Search the below code in red

<.div class='descriptionwrapper'>
<.p class='description'><.span><.data:description/><./span><./p>


Now Add the adsense code after these lines.

It will Look Like this:-


If you want adsense unit to be placed above the description and below header then place the adsense code above these red lines.

Embed Search Box In Blogger Header

Embed Search Box In Blogger Header that makes it look beautiful.You can also Embed Google Search Box In Blogger Header, to add to your earnings Or custom search engine to your blog. This is very important trick to increase your earnings of Adsense if you add google search as you will be got paid to get searched from your google search from your blog.


Now How to add this link unit to your Blogger Header?

1.Login to your blogger
2.Go to LAYOUT tab
3.Then EDIT HTML tab
4.Click On EXPAND WIDGETS to expand html
5. Search the below code in red


<.p class='description'><.span><.data:description/><./span><./p>

( Remove dots in the above code )
Now Add the seach code after these lines.

If you want to add your google search then add the google search code from adsense.

It will look like this:-


If you want search unit to be placed above the description and below title then place the search code above these red lines.

Scroll Bar Widget For Blogger

Scroll Bar Widget For Blogger i.e to add a scrolling bar to sidebar of blogger text or labels if list is too long.This scroll bar helpful if you have so many categories or want many posts to be seen in short space.

Lets Make a Scrolling Bar menu for your Blog

First of all sign in your blog and go to Layout section. Now you have to click on Add a Page Element Where you want to add the scrolling bar widget.

Click Image To enlarge


Select HTML JAVASCRIPT to add the page element .

Now You have to add some html codes to his page element to show of the scroll bar menu widget to the sidebar of your blogger.

==============================================

Get the Code Here
=================================
Copy this codes and paste it to page element and save it.

Now preview your blog.

You can change your links and text in the codes to show of yours links and posts.

Drop Down Menu For Blogger

Drop Down Menu For Blogger as everybody would like it in the blog. Just choose an option and click the menu you like , new window will open with the option selected. Below is the demo of it.


Now how to make this drop down menu.

Just GO To ,

LAYOUT > ADD PAGE ELEMENT > HTML /JAVASCRIPT

Add the below codes to it and Save It.

=============
Here Goes the COde
================


* Change the links and text in red according to your blog menu.

You can increase the options in codes to increase your drop down menu links.

Width of drop down menu depends on the length of the titles you using in them.

Bye friends see you tomorrow with my new pos

Change post title in blogger

Change post title in blogger,this is the best hack then previous as only post title is the title for seo and will be searched. As blog title will not be indexed in it as previous.It all depend on you to use which hack as if you feel you blog title to be indexed as well with every title then you can use previous post else follow my this new change post title hack in blogger.

Go to Layout then EditHtml

Search for this tag <..title data><:blog.pagetitle/>

Replace this tag with Following tag-

<.b:if cond='data:blog.pageType == "index"'>
<.title>
<.b:else/>
<.title>
<./b:if>

I hope you will like this swap title hack as this is very good for search engine optimization

Newspaper Style First Alphabet In Blogger Posts

Write in newspaper i.e magazine style in blogger posts as with first alphabet with big font and size as you may be seeing in this post.My first alphabet W is in newspaper style that is Big in size.So i think there is no need to show demo if you still want to have demo check my other posts will find for sure.sengihnampakgigi

Now how to install it is just simple.

Go to Edit HTML and find ]]>

Add the below codes before it


.newspaper {
float:left;
color:#000;
background:#fff;
line-height:80px;
padding-:1px 5px 0 0;
font-family:times;
font-size:100px;
}


You can adjust the font size and line height and color also i.e in red in the codes above according to the size of alphabet and color you want to use to adjust looks of your blog.

Now save your Template.

Now got to Setings > Fromatting > Post template

And add the below codes there and save it.


span class="newspaper">First Alphabet


Now When ever you will start a new post you will get the above codes in edit html tab where you can place your first letter in place of First alphabet.

Or add the above codes manually before starting every post and place your 1st letter in between

1st Letter

yahoo smileys emotions in blogger comments

Now Friends you can use yahoo smileys emotions in blogger comments as well. As you would have been using it in posts but now for blogger you can use them in your comments also and your readers will get happy and excited using them.lapar

Now I will tell you how to install it in Blogger.

But first you should have inline comment form in your blogger (i.e embed comment form below bloggger posts) If you have it then its ok . Continue reading this post otherwise first install it by visiting this post.

Now How To Install It.

LAYOUT > EDIT HTML > EXPAND WIDGETS


U will get the script Here

Horizontal Navigation Menu Links For Blogger

Horizontal Navigation Menu Links For Blogger:-This is very important hack for bloggers as we need to create a top menu of links with our links to important pages making the navigation in your blog very easy for your readers.As i have also explained an easy way before to add top menu links to blogger but some would have not liked the styled of that navigational menu links.

How to add these top navigational links below blogger header:-


Just Go To Layout > Edit Html

And Search For

Now add these below Css codes before it-


/* ----- LINKBAR ----- */
#bg_nav {
background: #000;
width: 960px;
height: 29px;
font-size: 11px;
font-family: Arial, Tahoma, Verdana;
color: #FFF;
font-weight: bold;
margin: 0px auto 0px;
padding: 0px;
border-top: 1px solid #333;
border-bottom: 1px solid #000;
overflow: hidden;
}

#bg_nav a, #bg_nav a:visited {
color: #FFF;
font-size: 11px;
text-decoration: none;
text-transform: uppercase;
padding: 0px 0px 0px 3px;
}

#bg_nav a:hover {
color: #FFF;
text-decoration: underline;
padding: 0px 0px 0px 3px;
}

#navleft {
width: 720px;
float: left;
margin: 0px;
padding: 0px;
}

#navright {
width: 220px;
font-size: 11px;
float: right;
margin: 0px;
padding: 6px 5px 0px 0px;
}

#navright a img {
border: none;
margin: 0px;
padding: 0px;
}


#nav {
margin: 0px;
padding: 0px;
list-style: none;
}

#nav ul {
margin: 0px;
padding: 0px;
list-style: none;
}

#nav a, #nav a:visited {
background: #222;
color: #FFF;
display: block;
font-weight: bold;
margin: 0px;
padding: 8px 15px;
border-left: 1px solid #000;
}

#nav a:hover {
background: #6e6d6d;
color: #FFFFFF;
margin: 0px;
padding: 8px 15px;
text-decoration: none;
}

#nav li {
float: left;
margin: 0px;
padding: 0px;
}

#nav li li {
float: left;
margin: 0px;
padding: 0px;
width: 150px;
}

#nav li li a, #nav li li a:link, #nav li li a:visited {
background: #333;
width: 160px;
float: none;
margin: 0px;
padding: 7px 30px 7px 10px;
border-bottom: 1px solid #000;
border-left: 1px solid #000;
border-right: 1px solid #000;
}

#nav li li a:hover, #nav li li a:active {
background: #666;
padding: 7px 30px 7px 10px;
}

#nav li ul {
position: absolute;
width: 10em;
left: -999em;
}

#nav li:hover ul {
left: auto;
display: block;
}

#nav li:hover ul, #nav li.sfhover ul {
left: auto;
}


Please edit the width of the above codes in red to adjust to the width of the navigation menu to adjust it to yours template width.You can change the color and design of above css also if you are capable of it.

Now Search for below codes-

<.div id='header-wrapper'>
<.b:section class='header' id='header' maxwidgets='1' showaddelement='no'>
<.b:widget id='Header1' locked='true' title='Testing templates (Header)' type='Header'/>
<./b:section>
<./div>

And add the below codes after the above codes:-


<.div id='navleft'>
<.div id='nav'>
<.ul>
<.a href='http://anshuldudeja.blogspot.com/search/label/Blogger%20Widget'>Widgets

  • <.a href='http://anshuldudeja.blogspot.com/search/label/Blogger%20Hack'>Hacks


  • <.a href='http://anshuldudeja.blogspot.com/search/label/Blogger%20Tutorial'> Tutorials


  • <.a href='http://anshuldudeja.blogspot.com/search/label/Blogger%20Templates'>Templates

  • <.a href='http://anshuldudeja.blogspot.com/2008/11/contact-us.html'>Contact

  • <./ul>
    <./div>
    <./div>
    <./div>


    in the above code remove (.) in tags

    Thats It Now Preview It.If its working fine just save your template.

    Change the links above in codes to yours.I hope you would like this navigation menu for sure.I will be back with one more great navigation link bar menu for sure ,uptil then enjoy this.

    New Two Column Denim Template

    I have designed a New Two Column Denim Template for you friends. I hope you will like it for sure. Its the Denim template by google i have just make it little streched added some widgets and colors to look it beautiful and proffesional.

    First i would like to show the preview of my template. You can watch below image.


    Its Live Demo | Download

    Installation

    1) Expnadable Post hack is Already Installed In it.

    2) Add The Links To your Top Menu widget from Below Change URls or from Here

    a href="http://www.about.com/" class="navigation">About
    a href="http://www.photos.com/" class="navigation">Photos
    a href="http://www.amazon.com/ class="navigation">Amazon
    a href="http://www.contact.com/" class="navigation">Contact


    3) Place The Google Leaderboard Code In advertisement Section.

    4) Now About the header of your template. As just visit this site and design a header for you.
    And Upload the Header image to your Blog using image instead of title and description.

    5) Page navigation Widget - Very Simple Just add it From Here.

    I hope You will Like this Template. If you come with any Problems in installing it Please Leave Your Comments.

    Fixed Side Menu For Blogger

    Fixed side menu for blogger blogspot or some says it as fixed slide in menu for blogger as was seen only in wordpress but now can be used in bloggers also.As you could see it in my blog i have side menu that moves together with you scroll movement up and down on my blog.I am sharing this with you because many of my readers were asking how to make it as they liked it much and wanted to add it to there blogs so if you liked side menu in my blog you can go further to install it in your blog too


    First Download these two files to your computer.


    ssm.js
    ssmItems.js

    Now open the ssmItems.js file in notepad


    //////////////////////////

    // ssmItems[...]=[name, link, target, colspan, endrow?] - leave 'link' and 'target' blank to make a header
    ssmItems[0]=["MENU"] //create header
    ssmItems[1]=["Home", "http://anshuldudeja.blogspot.com", ""]
    ssmItems[2]=["Blogger Widgets", "http://anshuldudeja.blogspot.com/search/label/Blogger%20Widget",""]
    ssmItems[3]=["Blogger Hacks", "http:///anshuldudeja.blogspot.com/search/label/Blogger%20Hack", ""]
    ssmItems[4]=["Blogger Tutorials", "http://anshuldudeja.blogspot.com/search/label/Blogger%20Tutorial", "_new"]
    ssmItems[5]=["Blogger Templates", "http://anshuldudeja.blogspot.com/search/label/Blogger%20Templates", ""]
    ssmItems[6]=["Contact", "http://anshuldudeja.blogspot.com/2008/11/contact-us.html", ""]

    ssmItems[7]=["FAQ", "#nogo", "", 1, "no"] //create two column row
    ssmItems[8]=["Email", "#nogo", "",1]

    ssmItems[9]=["External Links", "", ""] //create header
    ssmItems[10]=["Online Jobs", "http://earnwithbloggers.blogspot.com", ""]
    ssmItems[11]=["Funny Blog", "http://funny-concepts.blogspot.com", ""]
    ssmItems[12]=["Earn Money", "http://ezinfocenter.com/10142921/CB", ""]

    //-->


    Now just edit the the links in red in codes to place your own link which you want to display and text in blue which you want to show up the title for that link.

    After editing all these links just save the file.
    Now upload both files ssm.js and ssmItems.js to your own server.

    Now GO To LAYOUT > EDIT HTML
    and find the tag and place the below codes before it.

    ==================
    SCRIPT SRC="http://bandofgirls.googlepages.com/ssm.js
    SCRIPT SRC="http://bandofgirls.googlepages.com/ssmItems.js
    ====================
    And don't forget to change the links in red above with the links of yours where ssm.js and ssmItems.js file is uploaded to your own server.

    And now SAVE It.

    Yup you have just Done now. View your blog. If you have any problem please write below in comments i will help you out.I think you will enjoy this widget for sure.


    Rotating Add Banner Javascript

    Rotating Add Banner Javascript

    Rotating Add Banner Javascript is here for you friends where you can use javascript to show various add banners on same space by rotating it in timely banner. It will be very helpful for those who sometimes feel short of space to show there advertisers.As this is very helpful to show off different adds in timely manner

    Here is the javascript below which is very easy to use:-


    Just copy the codes from below and paste to your

    LAYOUT > ADD PAGE ELEMENT > HTML/JAVASCRIPT


    ===============================

    Get the code here

    ===============================

    All Blogger Posts Slideshow As News Headlines

    Blogger Posts Random Slideshow As News Headlines or you can say Rotating random posts blogger widget. In this widget all the blog posts of your blog are displayed randomly same way as you see the slideshow of pictures or you see in some news sites which show of there latest headlines as an slideshow of one coming after another.

    Some Of Its Feautres:-

    1. Shows one post title at a time.
    2. Links to the post.
    3. Shows post excerpt also.
    4. Every 5 seconds shows a new post.
    5. Cycles through all the posts in the blog.
    6. Starts a new cycle at the end of the list.
    7. Once loaded continues cycling even when not connected to the Internet.
    8. Uses official Google AJAX technology.
    9. Can be used on other blogging platforms (not tested).
    10. Hovering with mouse cursorover the post title halts the rotation till mouse moves off the gadget


    How to insall the widget:-

    Go To Layout > Page Element > Add A Gadget > Html/Javascript

    Add the below codes and save it

    =======================================================
    Get the code from Here

    =========================================================
    Just Replace the codes written in Red above with your blog url,with Heading of your widget and your width of the widget.Please dont remove Credits If you use them.